

Let’s dive in!
What You’ll Need:
A finished T-shirt design (preferably a high-resolution PNG or PSD with transparency)
Photoshop (any recent version)
A grunge texture (you can download free ones from sites like Unsplash or Textures.com)
Step 1: Open Your Design
Open your T-shirt design in Photoshop.
Make sure it’s on its own layer with a transparent background.
Optional: Add a solid color background (like black or gray) behind your design to better preview how it will look on a shirt.
Step 2: Desaturate (Optional)
If you want a faded, vintage color:
Select your design layer.
Go to Image > Adjustments > Hue/Saturation.
Lower the Saturation slightly and adjust Lightness if needed.
This gives your colors a soft, sun-faded look.
Step 3: Add a Grunge Texture
Drag and drop your grunge/distressed texture into the document.
Resize it (Ctrl+T) to cover your entire design.
Move the texture layer above your design.
Step 4: Create a Mask from the Texture
Now we’ll use the texture to “erase” parts of the design for a worn-out effect.
Ctrl+Click (Cmd+Click on Mac) on the texture layer thumbnail to make a selection.
Hide or delete the texture layer (we just needed the shape).
Select your design layer.
Click the Add Layer Mask button at the om of bottthe Layers panel.
Your design now looks like it’s been worn and faded naturally!
Step 5: Adjust the Distress Level
Want a more subtle or heavier vintage effect?
Invert the mask: Select the mask and press Ctrl+I to reverse the worn areas.
Paint on the mask with a soft black or white brush to manually add/remove distress.
Lower opacity of the design or mask for more fading.
You can always replace the texture with a different one or stack multiple textures for more complexity.
Step 6: Final Touches
Use Image > Adjustments > Curves or Levels to tweak contrast.
Add a color overlay or slight grain using Filter > Noise > Add Noise for more realism.
Make sure your background is transparent again before exporting for print.
Step 7: Save Your File
Save your master file as a PSD to keep layers intact.
Export as a PNG with transparency or a format your printer requires (PDF, TIFF, etc.).
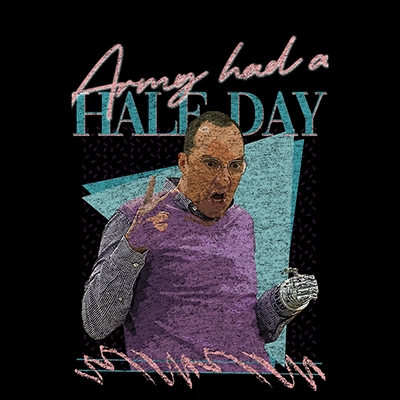
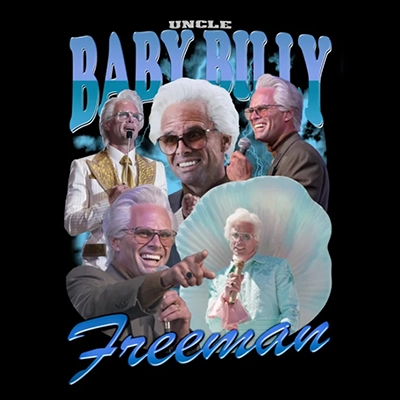
Example: How It Looks on a Shirt
When printed, this effect gives your design a soft, worn-in feel—not only visually but also physically if you're using DTF or screen printing methods that avoid overprinting solid areas.
Tips:
Try different grunge textures (concrete, paper, fabric, etc.).
Use brushes designed for distressing if you want more control.
Great for retro logos, band tees, and vintage sportswear looks.


Comments
0 comment